Are you having problems uploading images in WordPress? In this post, we will provide you with solutions for the most common reasons.
Troubleshooting image upload issues
If an image upload is not possible, this is usually due to one of the following reasons:
- The file size exceeds the allowed limit.
- The allowed execution time exceeds the time defined in the WordPress configuration.
- The image format is not one of the allowed file extensions for file uploads.
- The storage space on the server is full.
- The permissions for uploading files are missing.
- The file name is causing the problem.
- The upload folder does not exist.
Solution 1: Increase the maximum file size for an image upload
WordPress and the server settings define how large a file can be for upload – the server setting corresponds to the upper limit. Such an upper limit is standard and is particularly useful for websites where other users can also upload files.
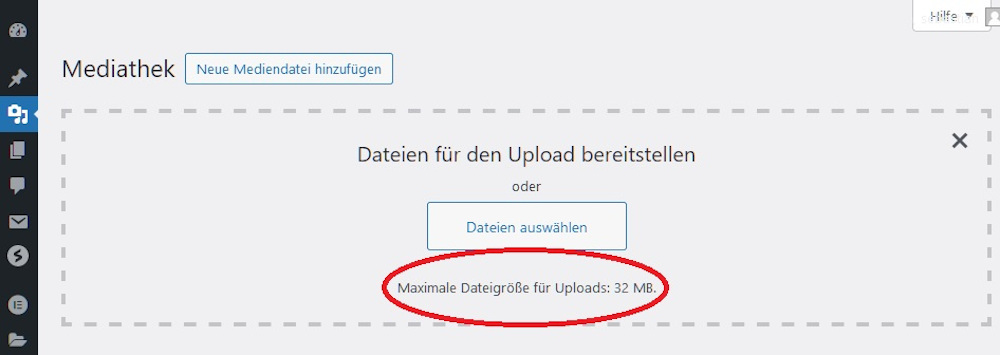
The WordPress default is 32 MB. This is usually enough for images, but may not be enough for photographers who want to upload uncompressed images in RAW format.

Figure 1: Check the maximum file size for uploads
You can check the current limit in the WordPress dashboard by clicking on “Media library” (Figure 1).

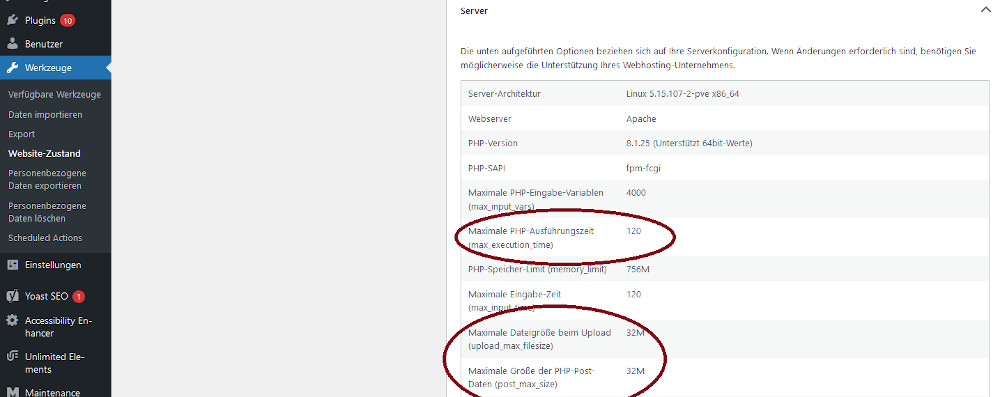
Figure 2: The server setting specifies the upper limit.
You can see the configured limit of the server under “Tools > Website Health” under the “Server” tab. The setting is located in the php.ini file, which customers of entry-level hosting plans often do not have access to.

Figure 3: The server-side limit is set in the php.ini file.
However , customers of professional WordPress hosting packages or with a virtual server can usually edit the file and adjust the limit themselves or request an increase from the provider. Look for the entry “upload_max_filesize” in the file and also for the entry for “post_max_filesize” and adjust the storage limit to, for example, 128 MB. The second value determines the maximum size of all files that can be sent via the POST method. “post_max_filesize” should therefore not be smaller than “upload_max_filesize”.

10% discount on all DF products
Solution 2: Increase the execution time
An execution time that is too short can lead to problems uploading images, especially with slow internet connections and a high memory limit. A higher memory limit should therefore also be accompanied by a higher execution time.
The entry is also located in the php.ini file under “max_execution_time”. As a result, the process does not terminate prematurely due to a timeout. For example, if you enter “max_execution_time = 180”, the limit for the maximum execution time is three minutes.
Solution 3: Expand the list of allowed file formats
By default, WordPress allows the following file types for images:
- JPEG
- PNG
- WebP
- GIF
- ICO
- AVIF (since WordPress 6.5)
In addition, you can upload videos, documents and audio files. If you have problems uploading images, it may be that someone has restricted the allowed file formats or you want to upload an unusual file format. With a plugin like WP Extra File Types, you can expand the list of allowed file types.
Solution 4: Buy more web space
Another possibility for problems with uploading images is insufficient web space if the hosting package only includes a few gigabytes of storage. Check the available space in the hosting administration area. The solution is to buy more storage space or switch to a plan with more storage volume.
Solution 5: Change the directory permission

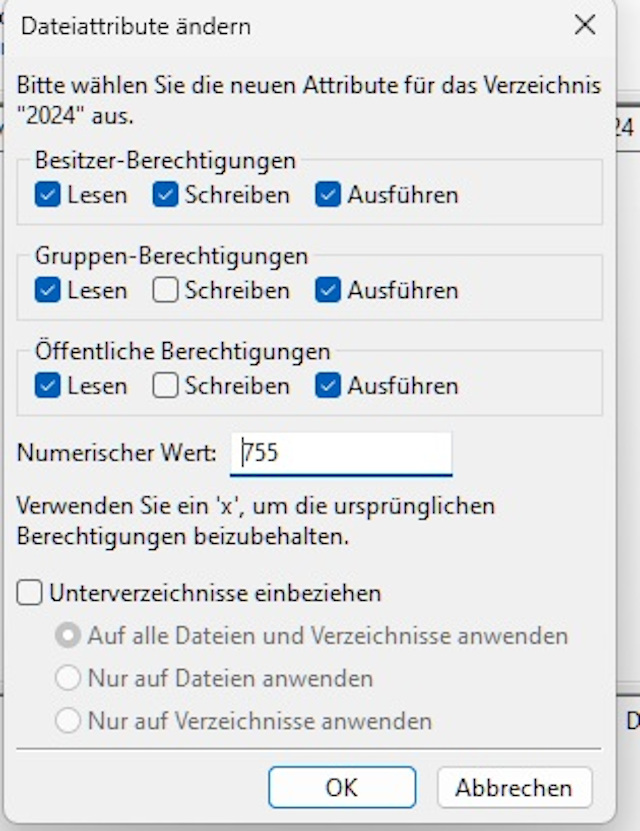
Figure 4: Check the write permissions in the upload directory
In the WordPress standard settings, the access rights to the upload directory are set correctly. However, it is possible that someone has changed the directory rights so that uploading images is no longer possible. To check, open the directory of the WordPress installation on the server using an FTP program such as FileZilla and in the “wp-content” directory, right-click on “uploads” and in the context menu on “file attributes”. Enter the value 755 as shown in the figure.
Solution 6: Change the file name
Another cause of problems with uploading or displaying images can be related to the file name. If the file name contains special characters, spaces or umlauts, the upload may fail or not all browsers may support the display. The best practice is therefore to write the file names in lowercase and not to use spaces, special characters or umlauts.
Tip : For search engine optimization (SEO), keep file names short and descriptive.
Solution 7: Check and correct the upload folder
Was the upload folder changed manually in the wp-config.php file and you no longer see uploaded images in the media library? Then the upload folder assignment may be incorrect – this can happen especially after a
domain move . To check the configuration, click on “Settings > Media” in the WordPress dashboard. With standard settings, you will only see the checkbox “Organize my uploads in month and year-based folders” under the heading “Upload files”. If the upload folder was changed manually, you will see the change in the entry “Save uploads in the following folder”. Then use an FTP program such as FileZilla to make sure that the specified folder exists on the server and that users have the necessary permissions as described in solution 5.
Fixing image upload problems in WordPress – Summary
Problems uploading images in WordPress can have various causes, which can be resolved with the solutions presented. With a professional WordPress hosting plan, you can prevent server-side problems such as insufficient storage space and severely limited file sizes.
Cover motif: Photo by rivage on Unsplash